Thursday, September 29, 2011

DIY Moss Wreath

Yes...I know...yet another Pinterest inspiration picture...someone please tell me why I didn't come up with the whole Pinterest thing...anyway...

You already know the story. Girl sees a picture on Pinterest. Girl loves picture. Girl attempts to create picture on a super small budget. The End.

Inspiration...

Pinned Image
source
You can buy one of these beautiful wreaths on Etsy for about $$$. Or you could make your own. I'm not saying you shouldn't buy it though...I'm just sayin'...you know...yo...

I started with an 18 inch grapevine wreath from Michaels. I like the Michaels grapevine a lot better than the ones from Hobby Lobby. I think they are thicker and rounder. Or maybe just less picked over. Or maybe I got lucky and was there on a good day...


Add a BIG bag of spanish moss...


and some awesome hot glue...


With a half a yard or so of burlap you can make a jam up bow...

And 3 little white pumpkins complete the look...


The finished product...


I love how the twigs of the grapevine peak through the moss...


Here's the breakdown of the cost...

Grapevine Wreath $4.99 with 50% off coupon...$2.49
1/2 Yard Burlap at $3.99 with 40% off coupon... $1.20
Big Bag of Moss at $5.99 with 40% off coupon...$3.60
3 white pumpkins at $1 each...$3

Total Cost... $10.29 plus tax, tag, and title

Now you know you don't have to take out a second mortgage to have a pretty front door!

Rachel :)

seriously though...Hancocks, Michaels, Hobby Lobby, and Joannes accept competitor coupons. You can't use your phone (yes, I've tried)...you have to go old school and print out the coupon on actual paper so they can mail it to their corporate office or something like that. I try to plan ahead and buy what I need on weeks that I can find 50% and 40% off one item...good luck!

southern hospitality
Pin It

Tuesday, September 27, 2011

It's Fall Y'all!

You know it's fall when your driveway starts to look like this...


And your yard starts to look like this...


Anyone who knows me also knows that I never say "Y'all"...but It's Fall You Guys just doesn't have the same ring to it! Fall is here...cooler temps, Starbucks Pumpkin Spice Latte, mums, pumpkins, and everything in between. Mr. T walked in the house today and wanted to know why it looked like a fall festival...


And this handsome man has been home for a few days with an ear infection
so I've had some super good company!


I think he's on the mend...

Rachel :)

The Lettered Cottage

Pin It

Monday, September 26, 2011

Are You Sure???

Last week, the following comment was left on one of my posts...


SHERRY HART said...
Hilarious...I googled gallery walls and found this post! Then I started looking around and I love your blog! So many great ideas. I would love to share your lemonade stand post if that is OK???

Seriously. At first I thought I was dreaming. I mean, Sherry Hart is a top notch designer in Atlanta. Then I thought, that she thought, that my lemonade stand was the inspiration picture and maybe she didn't like mine at all. OK, that's a lot of thoughts. So, I said..."are you sure???"...just kidding...I actually responded with...


          Accessorize and Organize said...
Thanks Sherry!! I would love for you to share anything you want :)


And then I emailed her beacuse I don't have the ability to play it cool...you know, and because I wanted her to know that YES, it was great if she used my lemonade stand...given that it was mine she wanted to use...

So, imagine my surprise yesterday when my phone did the email ding and the email was from SHERRY HART! Yes, she liked it, and her post was up!

Here is the link...make sure you check out her portfolio as well...and to make a short story even longer...she's also having a giveaway! All you have to do is follow her blog. Her posts will make you laugh out loud!!!

Happy Monday!
Rachel :)
Pin It

Thursday, September 22, 2011

Vodka. I Need Lots and Lots of Vodka.

I try to start thinking about holiday gifts in advance, picking up a few things here and there. This year, I'm giving handmade gifts to everyone: Mr. T, my parents and in-laws, aunts and uncles, siblings, and nephews and nieces. I'll be writing about it every step of the way. My mom has already given me her list: bread boards, vintage themed flour sacks, and redneck wine glasses. I began this week working on one gift because it takes a few months...


I started with Bourbon Vanilla Beans from Beanilla.


Then ordered glass bottles from Specialty Bottle Company.


I cut the vanilla beans into half,
then sliced them in half down the length of the bean.
After I opened them up, I placed 4 quarters in every bottle.


When I was done with the beans I filled the bottles with...you guessed it...vodka.
Lots and lots of vodka.


After it steeps for the next few months, I will have tons of bottles of
Homemade Vanilla Extract to pass out to family and friends.
Just in time for holiday baking!


the awesome labels are from My Own Labels

So...I've decided to take a little break from the photography challenge...going to blog less and work more...you know the saying..."worker smarter, not harder"...see you next week!

Rachel :)

to give credit where credit is due...this wonderful project came from Elaine at The Italian Dish.


HookingupwithHoH
Pin It

Tuesday, September 20, 2011

Spackle Can Change Your Life

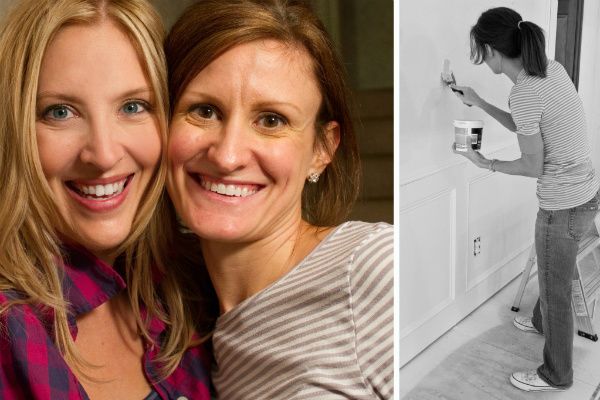
For once, I'm at a loss for words. I'm still trying to wrap my head around the craziness that was my life last week. It's rare for me to leave the family at home. Even rarer to have the chance to go to Atlanta for a few days by myself. Add that together and last week was a first...I left the family at home and went to Atlanta to help Layla and Kevin and the people from HGTV shoot a pilot. Seriously.

via The Lettered Cottage
Can you say best.day.ever. I had such a great time I can't even comprehend it. Did I mention I worked my butt off?! Oh yeah, it was a blast! I was with some really, really, really great people. And I learned a ton. Just how life should be.

It's easy to get in a rut. Go through the motions. Do the same thing day after day. A few days after I got home I ran across this quote...

Some people want it to happen.
Some people wish it would happen.
Others make it happen.
Michael Jordan

This couple is making it happen. They are extremely talented, smart, and hardworking. I stepped out of the box last week to make it happen. It wasn't easy, but it was so worth it. I learned so much...about spackle and about myself. Like I said...best.day.ever.

Carpe Diem!
Rachel :)
Pin It

Friday, September 16, 2011

Fridays Find

I recently stumbled upon a blog that I have fallen in love with...Our Vintage Home Love. Not only does Diana have really awesome skills, but she makes these fabulous bread boards that you can buy in her Etsy store. She puts them up every Monday morning, but know that they sell fast!! She is super talented, just look at how awesome her house is...


I also adore her kitchen...


I love the open shelving and stacks of solid white dishes. Turns out she bought them at the Dollar Tree and swears by their ability to handle the bumps that go along with kids (she has four!). Affordable, practical, and easy on the eyes...what's not to love?!?

Rachel :)

So...it's been a super crazy week! I'm hoping to get caught up on my photography challenge this weekend!
Pin It

Thursday, September 15, 2011

French Flour Sacks

I love using flour sacks in the kitchen. I use them to bake, clean, cook...seriously...for everything. Last week I came across some cute french ones in an Etsy store. They were very reasonably priced at $8 each. Shipping started at $3. Not bad, but I was interested in more than one...and the numbers added up fast. Instead, I googled vintage kitchen clip art and found a few really great FREE designs from The Graphics Fairy. Tucked away with some craft supplies I had transfer paper left over from a previous project, and...here's the rest...

You will need:
Flour sacks (washed and dried)
Design of your choice printed on transfer paper (make sure the text is reversed)
Hot iron


Iron your clean flour sack and place the design where you want it.
Iron on a dry hot setting for 4 minutes.


Let it cool for 1 minute then peel off backing paper.


Magnifique!!!

Rachel :)


HookingupwithHoH
Pin It

Wednesday, September 14, 2011

Taking a day...

I'm taking today off to hang out in Atlanta for a bit...of course I saw Marlene...but I am super excited about what is in store for today! If you read The Lettered Cottage (and if you don't, then you should), you already know all about Layla and Kevin's tv pilot taking place in Atlanta this week. With the help of a wonderful husband, a good friend, and a babysitter, I was able to come in last night and spend the night with Marlene. Today, I'm headed to work my butt off and have a good time with Layla, Kevin, and the rest of their crew making over the living room of one seriously lucky couple! I could not be more excited!!!

Here's to ripping out carpet, taking down wallpaper, and tackling what will be a super fun project! Have a GREAT day!

Rachel :)
Pin It

Tuesday, September 13, 2011

DIY Burlap Wreath

Ever since I painted my back door, and added some fabulous new numbers to it, I've been eyeing some fall wreaths to finish it up. These two caught my eye...

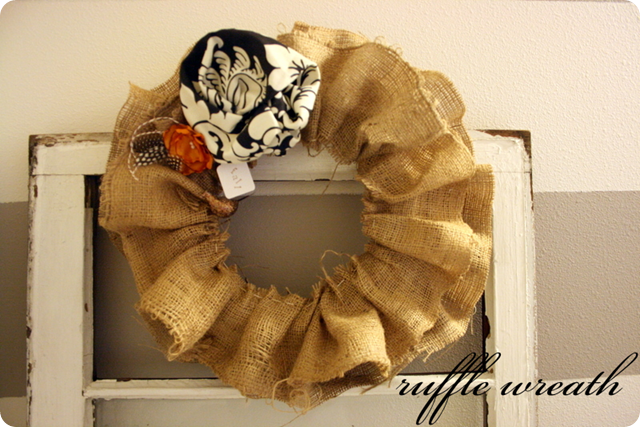
ruffle wreath
Jones Design Company

Etsy
They are similar and different...I love the ruffles on both. The first one is a bit shabbier while the second is more tailored. I tried to combine the two and this is what I came up with...
This is what you'll need:
foam wreath
1 to 1 1/2 yards of burlap
hot glue gun
straight pins


I cut the burlap into three, 2 to 3 inch strips. I then wrapped them around the wreath securing with hot glue and pins until the entire wreath was covered.


The rest of the burlap I cut into 6 inch strips. I sewed the long ends together to make a tube. I then pulled it through so the seam was on the inside. This is when I began to gather and glue it around the wreath.


I tucked a little of the fabric under itself, attaching with the hot glue and securing with the straight pins.


It took almost two of the long tubes of burlap I had sewn
to complete the first layer.


I repeated the process, this time attaching the ruffle to the center of the wreath.
After both layers of ruffles were on I tried to smush the back layer down a bit by pushing straight pins through every few inches to make it poof a bit. I also did this with the front layer. The pins go in nice and tight if you stick them through a spot where there is some glue.


Happy Fall!

PHOTOGRAPHY CHALLENGE
Day 13
A picture of yourself with 13 things...seriously, I think you've seen enough of me in pictures. And 13 things...hmmmm...how about the number 13...


These cute jars were picked up for me by a super friend who knows my love for anything numbered!

Happy Tuesday!

Rachel :)


southern hospitality
Pin It