Showing posts with label Kitchen. Show all posts

Saturday, December 31, 2011

These are a few of my favorite things...

Before we sent 2011 off, here are a few of my favorite projects from the past year...


Smurfettes Lemonade Stand...this was by far my favorite!! I learned it is a pain in the a$$ to take apart pallets, but we had such a fun time as a family making this!


Budget Breakfast Nook...It is so incredibly awesome to NOT have the washer and dryer in the kitchen anymore! And we were able to create this on a super slim budget after finding a great piece at our Habitat ReStore!


Kids Outdoor Chalkboard...I learned that making outdoor chalkboard paint is harder than it looks, but the kids LOVE this! Neighbours comment on it when they drive by and after 6 months it is still in perfect condition...yay!


Jules Back Deck...My very first total design project where I got to spend someone else's money and do what I wanted. This was a fun, stressful, learning experience. They love the end result, as do I, and I hope to be able to do this again!
via The Lettered Cottage
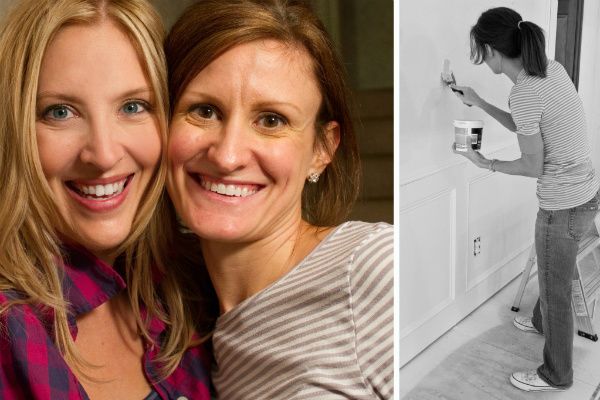
Spackle Can Change Your Life...In September I went to Atlanta to help Layla and Kevin and the people from HGTV shoot a TV pilot. Seriously. I learned so much...about Spackle and about myself. Hopefully January will bring great things for this sweet couple...I'll keep you posted.


Of course there are other projects I loved like making homemade vanillaour wonderful new laundry closet, and the kids homework area.

The past year I fell in love with old windows, wood pallets, and chalkboards.

We grew as a family and the Smurfs proved that they are old enough to help with projects and make design decisions. :) I grew as a person by taking my first big solo trip to Boston and realizing they would survive without me.

Marlene decided she didn't want to blog anymore because she didn't have anything to say, but I'm still trying to convince her to come back because she is by far the funniest person I know. And she's my best friend. And I love her.

Overall, it was a great eye opening, learning, wonderful year and I am so looking forward to 2012...

Happy, Happy New Year!

Rachel :)
Pin It

Monday, November 28, 2011

DIY Kitchen Tile BackSplash

So...I know nothing about tiling. As in zilch. Zero. Nada. A few months ago, my dear friend Ann asked me if I could tile her kitchen backsplash. She and her husband had purchased the tile (and "stuff"), and it had been hanging out on her dining room floor ever since. I thought sure...I'd go to the tile class they offer at my local Home Depot, learn how to do it, and help her out. Well...I missed all the tile classes in September, they offered none in October, and all of a sudden it was Thanksgiving and I still didn't know how to tile. This is why I have the most wonderful friends. I can seriously not know anything about anything, and they still want me to come over and practice on their houses. Their nice houses..that they love! Talk about having faith in someone!

The kids and I got up Wednesday morning and headed to the big metropolis of Gray. Luckily our kids love each other so it was great that they were able to entertain themselves while we got to work. Here's how it went down...

before

before
getting ready to put the tile up

tile is on and dry...grouting

waiting to wipe off and surveying the mess I made...

after

after

after

after
They picked out a great tumbled slate mosaic blend tile. The tiles are 1" x 1" and came on a 12" x 12" mesh backing. We went with a coordinating tile strip to break up the pattern and add a little  more texture to the backsplash. It's super durable and will be able to handle any kitchen messes that might go its way!

Rachel :) 
Pin It

Sunday, October 2, 2011

Pumpkin Muffins and More...

When the weather gets nice, my attention span tends to not function, resulting in DIY overload. It happened this weekend. I started by deciding that the table in the breakfast nook was too dark and maybe I needed to strip it...


I should have been doing laundry...


Or cleaning the kitchen...


But when I sat down at the computer and pulled up Pinterest (hello...I have a problem), I saw some pumpkin muffins that I had to make. That minute. Thank goodness I had everything I needed, because I never over buy when Publix has awesome B1G1...hmmmmmm....

You will need a whopping two ingredients...


Canned pumpkin and cake mix...that's it! The recipe calls for Golden Yellow. All I had was Butter Golden...Butter=Good...


I mixed them together with my mixer from 1974. That's right. 1974. Don't hate. It's a MixMaster with a Burst Of Power. When my mom and dad married, my grandfather thought every good southern woman should have a mixer. So he bought this one for my mom. When I moved into my first apartment, I inherited the mixer. It rocks my socks. Seriously. Mixing is a lost art...as is sanding...


Mix and divide.  


Bake at 350* for 20-25 minutes.


When they come out, they will be as awesome as these...just add a little powered sugar. Or turn into Martha Stewart and make some homemade cream cheese icing. I had laundry and cleaning and sanding calling my name...

Rachel :)


Pin It

Thursday, September 22, 2011

Vodka. I Need Lots and Lots of Vodka.

I try to start thinking about holiday gifts in advance, picking up a few things here and there. This year, I'm giving handmade gifts to everyone: Mr. T, my parents and in-laws, aunts and uncles, siblings, and nephews and nieces. I'll be writing about it every step of the way. My mom has already given me her list: bread boards, vintage themed flour sacks, and redneck wine glasses. I began this week working on one gift because it takes a few months...


I started with Bourbon Vanilla Beans from Beanilla.


Then ordered glass bottles from Specialty Bottle Company.


I cut the vanilla beans into half,
then sliced them in half down the length of the bean.
After I opened them up, I placed 4 quarters in every bottle.


When I was done with the beans I filled the bottles with...you guessed it...vodka.
Lots and lots of vodka.


After it steeps for the next few months, I will have tons of bottles of
Homemade Vanilla Extract to pass out to family and friends.
Just in time for holiday baking!


the awesome labels are from My Own Labels

So...I've decided to take a little break from the photography challenge...going to blog less and work more...you know the saying..."worker smarter, not harder"...see you next week!

Rachel :)

to give credit where credit is due...this wonderful project came from Elaine at The Italian Dish.


HookingupwithHoH
Pin It

Friday, September 16, 2011

Fridays Find

I recently stumbled upon a blog that I have fallen in love with...Our Vintage Home Love. Not only does Diana have really awesome skills, but she makes these fabulous bread boards that you can buy in her Etsy store. She puts them up every Monday morning, but know that they sell fast!! She is super talented, just look at how awesome her house is...


I also adore her kitchen...


I love the open shelving and stacks of solid white dishes. Turns out she bought them at the Dollar Tree and swears by their ability to handle the bumps that go along with kids (she has four!). Affordable, practical, and easy on the eyes...what's not to love?!?

Rachel :)

So...it's been a super crazy week! I'm hoping to get caught up on my photography challenge this weekend!
Pin It

Thursday, September 15, 2011

French Flour Sacks

I love using flour sacks in the kitchen. I use them to bake, clean, cook...seriously...for everything. Last week I came across some cute french ones in an Etsy store. They were very reasonably priced at $8 each. Shipping started at $3. Not bad, but I was interested in more than one...and the numbers added up fast. Instead, I googled vintage kitchen clip art and found a few really great FREE designs from The Graphics Fairy. Tucked away with some craft supplies I had transfer paper left over from a previous project, and...here's the rest...

You will need:
Flour sacks (washed and dried)
Design of your choice printed on transfer paper (make sure the text is reversed)
Hot iron


Iron your clean flour sack and place the design where you want it.
Iron on a dry hot setting for 4 minutes.


Let it cool for 1 minute then peel off backing paper.


Magnifique!!!

Rachel :)


HookingupwithHoH
Pin It

Sunday, September 4, 2011

Skirted Sink

Did you read this post about my most favorite of all time kitchen? Here's another picture...


for the love of a house
Oh how I heart the linen skirt under her kitchen sink. Such an easy fix to break up lots of bottom cabinetry...genius! I pulled out the sewing machine (technically it was out because of these...) and got to work...before...


and after...


This was a cheap and simple project...the best kind! I removed the cabinet doors, sewed a rectangle from 2 yards of burlap with a hem at the top to thread a tension rod through. The burlap was $7.20 (I had a 40% off coupon from Hancock Fabric) and the tension rod was $5.99 from Kmart. I could have gotten one for $2.99, but wanted one a little more sturdy. I'll let you know how it holds up. The shot today for the Photography Challenge has to be from a high angle. One more of the kitchen...


Happy Sunday!!

Rachel :)



Pin It