Showing posts with label Food. Show all posts

Monday, April 30, 2012

DIY Cake Pop Stand


It's been a few months...but what can I say...spring means baseball, ballet, school plays, and lots and lots of fun stuff to do! I'm still working on a few DIY projects, and today I have a quick, fun project to bring you. A few months ago, a friend asked me to help her with a birthday party she was giving. A grownup, "non-cheesy" birthday party. She wanted a dessert table set up with a stand large enough to hold a variety of cake pops (yummmmm) and miniature cones filled with mousse...

I took two unfinished, different sized bar stool seats...a large one for the bottom, a smaller one for the top and measured where I wanted the holes. The drilled size of the holes for the cake pops turned out to be perfect...easy to get them in and out, yet small enough to hold them up straight. Make sure to not drill these holes all the way through. That way you can pick up the stand without them falling though. I marked an extra pop stick with a line on how deep I wanted them to sit and used it as a guide when drilling the holes. This ensured they would all sit at the same height.

The miniature cones on top needed large holes that went through the wood. I used a drill bit from a Porter Cable Forstner Bit Set (best purchase ever) to drill these holes. When I was done drilling, everything was sanded, primed, and put together using a large candle pillar from Hobby Lobby (it was bright green in its former life). The finished product was sprayed in Antique White (one of my favorite colors) and distressed using Special Walnut stain.

When the cake pops arrived from the bakery (carrot cake in white chocolate and red velvet in chocolate), I trimmed an inched off the sticks of the white ones to create two tiers on the bottom stand. The miniature cones were filled with a variety of mousses (after I snapped this picture) and the dessert table was complete!


Yummy!!!

Rachel :)

sorry for the complete lack of pictures...i seem to be on the fly recently, only snapping pictures with my cell phone. email me with any questions!
Pin It

Saturday, January 28, 2012

The Perfect Gift for that Special Someone


I need to back up a few weeks. While everyone is excited and talking about Valentines Day, I'm still stuck on Christmas. Specifically, the gift I gave Mr. T this year...I called it the "Bucket of Fun" and it is what the name says...a bucket filled with fun things for us to do! After 16 years, two kids, a mortgage, a dog, work and everything else, it can be hard to carve time out of the day week month for each other. Mr. T loves to go out...dinner, movies, anything! It's not that easy to coordinate his call schedule with baseball, dance, school activities, and life. By putting this together, dates are planned and paid for...all we have to do is schedule the babysitter.


Here's the breakdown of what was in the bucket:

The Bucket...a refillable movie theatre popcorn bucket. We can take it to the movies and have it filled for $3.50 every time we go.

Movie Tickets...a booklet of $25 in coupons that are good for movie tickets and snacks. This should give us two movie dates.

Bowling Gift Card...I know its hokey, but we like to go bowling. This gift card will pay for our shoes and four games.

Dinner Gift Cards times Two...I included two gift cards to two different restaurants. We can add this with something else or just go out for a nice dinner.

Theatre Tickets I...I am excited about this. It is one of two things that had a specific date. Next weekend we get to see Frost/Nixon. He made sure to ask for the weekend off and the babysitter is already lined up...yay!

Theatre Tickets II...I'm even more excited about this date. In March we have tickets to see Damn Yankees. Friends of ours have tickets for the same night, so it will be a fun double date!

Zip lining...You read that right...Mr. T's favorite thing to do! While he is super excited, my palms are already sweaty!! I bought these from Groupon in the fall and they don't expire until the end of April. A few friends purchased them as well, so it will be a scary but fun group date.

Mr. T was thrilled with this! It was all about him and what he likes to do. When it comes to gifts there is always something we want or need for the house and let's face it, while 7 pallets of sod for your anniversary or new wiring in the living room for Christmas are great...this year it was about him. With a birthday in May, the bucket might need to be refilled then. Something tells me I might have started a new tradition!

Fill a bucket and give it to your loved one...

Rachel :)
Pin It

Sunday, January 22, 2012

The Best (Vegetarian) Tacos Ever...

The Smurfs winter break was three weeks this year, so a few days after New Years we packed up and headed for warmer weather...the beach? Florida? California? Nope...Texas! We definitely don't take your run of the mill family vacations...the kids have never been to Disney and we don't go to the beach all that much. My theory is that there are a lot of places I want to see in this great, big world of ours and it's not going to happen if we run to the beach or Orlando every chance we get. Last year for spring break, when all of our friends were packing their swimsuits, we packed our snow bibs and headed out west for a week of skiing and snow...


Our return trip didn't go exactly as planned when our airline overbooked our flight. While most people complain and groan when this happens, we took the bump, and were rewarded with another day in Colorado and eight round trip tickets to ANYWHERE they fly...oh yeah...Mr T. was fretting if we had made the right decision, and I was doing my happy dance. Everyone knows how expensive it is for a family of four to fly.

Fast forward eight months, and we were on our way to San Antonio, excited to catch up with old friends and soak up some wonderful culture. We walked a ton, saw even more, and ate our way through this great city.

Pinned Image
Peas and Thank You

And while I know I will never eat guacamole as good as Boudros, I did come home and find a great recipe for Roasted Chic Pea Tacos. One of the BEST recipes I have ever made, it's a must have for the recipe book. I'm not a huge fan of meat (blah) and generally use black beans on my tacos, so I was super excited to have something new to try. Check these out...they are the best things you will ever put in your mouth!!

Rachel :)


Our favorite way to eat chickpeas and quite possibly the best tacos ever.
Ingredients (8 tacos)
  • 2 t. chili powder
  • 1/4 t. garlic powder
  • 1/4 t. onion powder
  • 1/4 t. dried oregano
  • 1 1/2 t. ground cumin
  • 1 t. sea salt
  • 1 T. lime juice
  • 2 T. water
  • One 14 oz. can of chickpeas, drained and rinsed
  • 8 organic taco shells (i.e. Trader Joe’s brand)
  • Taco trimmings: shredded cabbage, tomato, guacamole, non-dairy (i.e. Daiya) or organic cheese, etc.
Instructions
  • Preheat oven to 375 degrees. In a large bowl, combine chili powder, garlic powder, onion powder, oregano, cumin, salt, lime juice and water.
  • Add chickpeas and marinate for at least 30 minutes.
  • Place chickpeas on a baking sheet that has been sprayed with cooking spray.
  • Bake for 20-30 minutes, stirring once during cooking, until chickpeas are slightly crispy.
  • Prepare taco shells according to package directions. Fill with chickpeas and desired toppings.
Pin It

Saturday, December 10, 2011

How to Eat a Pomegranate

via Little Bit Funky

This is the BEST thing I saw on the web this week. Seriously. Crystal, over at a Little Bit Funky, breaks down how to eat a pomegranate...into some awesome easy steps. I LOVE poms. I love to eat them. I hate to break, cut, bend, or do what you have to do to get the seeds outs. I get juice all over me, my clothes, the kitchen counter, floor, shutters, everything...Crystal makes it easy peasy...yay!!!

Rachel :)
Pin It

Monday, October 10, 2011

Apple-Cream Cheese Cake

Last week, the husband of a dear friend of mine deployed overseas. In trying to keep her upbeat, busy, and happy, I dragged her out this morning for a 5 mile run in the rain. Actually, the run was her idea, the rain was out of our control, and the 5 miles were my idea. I tricked her into thinking a long loop was a short loop and 5 miles later we were soaking wet and she had a few choice words for me. There were four of us that ran together on this dreadful Monday morning, but the miles flew by with great friends and great conversation. I'll admit that when it was over we all felt a little (maybe a lot) tougher, stronger, and despite the weather...happier.


When I got home I saw a Southern Living magazine (September 2011) on the kitchen counter that she had been flipping through a few days prior. While looking through, she told me that for her birthday she wanted me to make the Apple-Cream Cheese Bundt Cake that was featured on the cover. Great...I'm all in...but her birthday is not until March. Seriously. So, on this rainy afternoon I found myself thinking why wait until March!?! Life is short...lets eat cake! I sent her a text and invited her and her three adorable kids over for dinner and cake. Because what can be better on a cool, rainy, fall night than friends and cake!


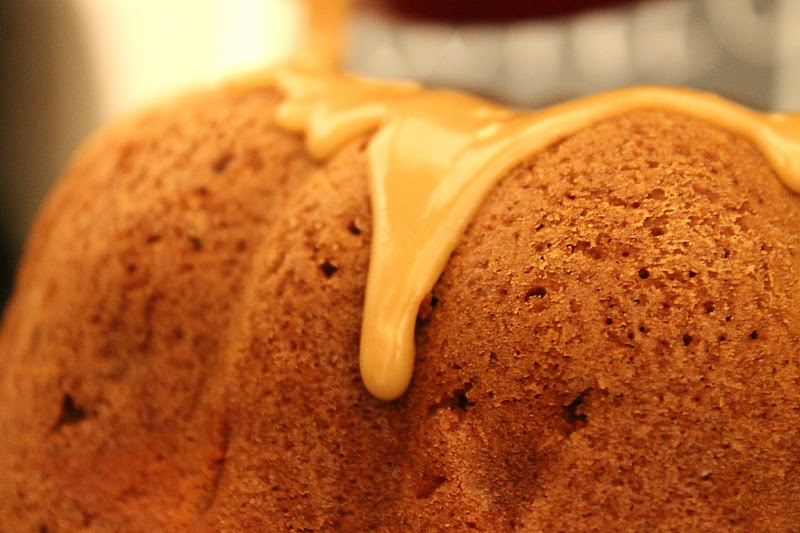
and here's the picture from Southern Living...because mine wasn't quite as pretty, but it was so good I'm sure my stomach didn't notice...

Apple-Cream Cheese Bundt Cake Recipe

Ingredients

  • CREAM CHEESE FILLING:
  • 1 (8-oz.) package cream cheese, softened
  • 1/4 cup butter, softened
  • 1/2 cup granulated sugar
  • 1 large egg
  • 2 tablespoons all-purpose flour
  • 1 teaspoon vanilla extract
  • APPLE CAKE BATTER:
  • 1 cup finely chopped pecans
  • 3 cups all-purpose flour
  • 1 cup granulated sugar
  • 1 cup firmly packed light brown sugar
  • 2 teaspoons ground cinnamon
  • 1 teaspoon salt
  • 1 teaspoon baking soda
  • 1 teaspoon ground nutmeg
  • 1/2 teaspoon ground allspice
  • 3 large eggs, lightly beaten
  • 3/4 cup canola oil
  • 3/4 cup applesauce
  • 1 teaspoon vanilla extract
  • 3 cups peeled and finely chopped Gala apples (about 1 1/2 lb.)
  • PRALINE FROSTING:
  • 1/2 cup firmly packed light brown sugar
  • 1/4 cup butter
  • 3 tablespoons milk
  • 1 teaspoon vanilla extract
  • 1 cup powdered sugar

Preparation

  • 1. Prepare Filling: Beat first 3 ingredients at medium speed with an electric mixer until blended and smooth. Add egg, flour, and vanilla; beat just until blended.
  • 2. Prepare Batter: Preheat oven to 350º. Bake pecans in a shallow pan 8 to 10 minutes or until toasted and fragrant, stirring halfway through. Stir together 3 cups flour and next 7 ingredients in a large bowl; stir in eggs and next 3 ingredients, stirring just until dry ingredients are moistened. Stir in apples and pecans.
  • 3. Spoon two-thirds of apple mixture into a greased and floured 14-cup Bundt pan. Spoon Cream Cheese Filling over apple mixture, leaving a 1-inch border around edges of pan. Swirl filling through apple mixture using a paring knife. Spoon remaining apple mixture over Cream Cheese Filling.
  • 4. Bake at 350º for 1 hour to 1 hour and 15 minutes or until a long wooden pick inserted in center comes out clean. Cool cake in pan on a wire rack 15 minutes; remove from pan to wire rack, and cool completely (about 2 hours).
  • 5. Prepare Frosting: Bring 1/2 cup brown sugar, 1/4 cup butter, and 3 Tbsp. milk to a boil in a 2-qt. saucepan over medium heat, whisking constantly; boil 1 minute, whisking constantly. Remove from heat; stir in vanilla. Gradually whisk in powdered sugar until smooth; stir gently 3 to 5 minutes or until mixture begins to cool and thickens slightly. Pour immediately over cooled cake.
Don't let the directions and ingredient list intimidate you. Most everything I had in the pantry. It did however, take some time...the cake took about an hour to make. Confession...I didn't peel the apples. It baked for 75 minutes and cooled for two hours. The Praline Frosting was so easy and went on great. This should be a must bake for everyone this fall! Enjoy!

Rachel :)
Pin It

Sunday, October 2, 2011

Pumpkin Muffins and More...

When the weather gets nice, my attention span tends to not function, resulting in DIY overload. It happened this weekend. I started by deciding that the table in the breakfast nook was too dark and maybe I needed to strip it...


I should have been doing laundry...


Or cleaning the kitchen...


But when I sat down at the computer and pulled up Pinterest (hello...I have a problem), I saw some pumpkin muffins that I had to make. That minute. Thank goodness I had everything I needed, because I never over buy when Publix has awesome B1G1...hmmmmmm....

You will need a whopping two ingredients...


Canned pumpkin and cake mix...that's it! The recipe calls for Golden Yellow. All I had was Butter Golden...Butter=Good...


I mixed them together with my mixer from 1974. That's right. 1974. Don't hate. It's a MixMaster with a Burst Of Power. When my mom and dad married, my grandfather thought every good southern woman should have a mixer. So he bought this one for my mom. When I moved into my first apartment, I inherited the mixer. It rocks my socks. Seriously. Mixing is a lost art...as is sanding...


Mix and divide.  


Bake at 350* for 20-25 minutes.


When they come out, they will be as awesome as these...just add a little powered sugar. Or turn into Martha Stewart and make some homemade cream cheese icing. I had laundry and cleaning and sanding calling my name...

Rachel :)


Pin It

Thursday, September 22, 2011

Vodka. I Need Lots and Lots of Vodka.

I try to start thinking about holiday gifts in advance, picking up a few things here and there. This year, I'm giving handmade gifts to everyone: Mr. T, my parents and in-laws, aunts and uncles, siblings, and nephews and nieces. I'll be writing about it every step of the way. My mom has already given me her list: bread boards, vintage themed flour sacks, and redneck wine glasses. I began this week working on one gift because it takes a few months...


I started with Bourbon Vanilla Beans from Beanilla.


Then ordered glass bottles from Specialty Bottle Company.


I cut the vanilla beans into half,
then sliced them in half down the length of the bean.
After I opened them up, I placed 4 quarters in every bottle.


When I was done with the beans I filled the bottles with...you guessed it...vodka.
Lots and lots of vodka.


After it steeps for the next few months, I will have tons of bottles of
Homemade Vanilla Extract to pass out to family and friends.
Just in time for holiday baking!


the awesome labels are from My Own Labels

So...I've decided to take a little break from the photography challenge...going to blog less and work more...you know the saying..."worker smarter, not harder"...see you next week!

Rachel :)

to give credit where credit is due...this wonderful project came from Elaine at The Italian Dish.


HookingupwithHoH
Pin It

Sunday, September 11, 2011

Photography Challenge. Day 10.

Favorite childhood memory.


Campfires and s'mores. Ahhhhhh...fall is in the air!

Rachel :) Pin It

Wednesday, August 24, 2011

Yummy, Yummy

Every now and then I like to share a recipe that the family loves. Well, we LOVE this dinner. The Smurfs request it every week and it has become a fast family favorite...


Spinach Lasagna Rolls from
Gina's Skinny Recipes

Servings: 9 Serving Size: 1 roll Old Points: 4 pts Points+: 6 ww pts
Calories: 224.9 • Fat: 5.1 g Fiber: 3.4 g Protein: 13.0 g Carbs: 31.5

  • 9 lasagna noodles, cooked
  • 10 oz frozen chopped spinach, thawed and completely drained
  • 15 oz fat free ricotta cheese
  • 1/2 cup grated Parmesan cheese
  • 1 egg
  • salt and fresh pepper
  • 32 oz tomato sauce
  • 9 tbsp (about 3 oz) part skim mozzarella cheese, shredded
Preheat oven to 350°. Combine spinach, ricotta, Parmesan, egg, salt and pepper in a medium bowl. Ladle about 1 cup sauce on the bottom of a 9 x 12 baking dish.

Place a piece of wax paper on the counter and lay out lasagna noodles. Make sure noodles are dry. Take 1/3 cup of ricotta mixture and spread evenly over noodle. Roll carefully and place seam side down onto the baking dish. Repeat with remaining noodles.

Ladle sauce over the noodles in the baking dish and top each one with 1 tbsp mozzarella cheese. Put foil over baking dish and bake for 40 minutes, or until cheese melts. Makes 9 rolls.

To serve, ladle a little sauce on the plate and top with lasagna roll.


If you are paying attention then you have already realized that the recipe calls for 9 noodles and there are 12 in my picture...here's my adaptation of the original recipe:

in bowl number 1 I mix:

1/2 pound browned ground beef
1/2 container 15 oz part skim ricotta cheese
1/2 cup shredded parm cheese
1 egg
salt, pepper, and Italian seasoning to taste

in bowl number 2 I mix:
10 oz frozen spinach, thawed and drained
1/2 container 15 oz part skim ricotta cheese
1/2 cup shredded parm cheese
1 egg
salt and pepper to taste

From here I follow the rest of the recipe. Each bowl makes 6 lasagna rolls. 12 fit into a 9x13 pan easily and are super yummy! My picture is a little janky, so click the link above to check out Gina's awesome pictures!

Make, eat, and enjoy!

Rachel :)

Pin It

Monday, June 20, 2011

Movie Night

Smurfettes 8th birthday was last week and we had a great time celebrating Friday night with a High School Musical movie night. We woke up Friday morning to sunny skies which turned dark and rainy by 4pm...ugh! We braved the elements, and by 7pm (party time) the rain cleared and the girls had a GREAT times. Here are a few shots...

DIY Tissue Paper Pom-Poms and Dollar Tree Lanterns

Burlap table cover, wrapping paper runner, and DIY cake stands

Make your own Popcorn Cupcakes

outdoor movie provided by FunFlicks

DIY Outdoor Chalkboard

Smurfette's PlayHouse...a great Craigslist find

popcorn kernels + mason jars = Party Favors
I love having the Smurfs birthday parties at home with lots of fun activities to do. The girls watched a great movie and had tons of fun with chalk, bubbles, and playing in the backyard. Tomorrow I'll fill you in on one of the best parts of the party...

Rachel :)


Pin It